|
In this article, I’m going to explain how to implement motion controls in the browser. That means you’ll be able to create an application where you can move your hand and make gestures, and the elements on the screen will respond. Here’s an example: See the Pen [Magic Hand – Motion controls for the web [forked]](https://ift.tt/R58I96p) by Yaphi. Anyways, there are a few main ingredients you’ll need to make motion controls work for you:
Note: This article assumes a general familiarity with HTML, CSS, and JavaScript, so if you’ve got that, we can get started. Also note that you may need to click on the CodePen demos in case any previews appear blank (camera permissions not granted). Step 1: Get The Video DataThe first step of creating motion controls is to access the user’s camera. We can do that using the browser’s Here’s an example that gets the user’s camera data and draws it to a See the Pen [Camera API test (MediaDevices) [forked]](https://ift.tt/xOlLvQz) by Yaphi. From the example above, this code gives you the video data and draws it to the canvas:
When you run The camera data comes as an object known as a You can create more canvas effects with your video data, but for the purposes of this article, you know enough to move on to the next step.
More after jump! Continue reading below ↓
Step 2: Track The Hand MotionsNow that you can access frame-by-frame data of a video feed from a webcam, the next step in your quest to make motion controls is to figure out where the user’s hands are. For this step, we’ll need machine learning. To make this work, I used an open-source machine learning library from Google called MediaPipe. This library takes video frame data and gives you the coordinates of multiple points (also known as
Here’s the library in action: See the Pen [MediaPipe Test [forked]](https://ift.tt/zSGtL0T) by Yaphi. 
Here’s some boilerplate to get started (adapted from MediaPipe’s JavaScript API example):
The above code does the following:
Let’s take a closer look at the
A couple of notes:
Here’s a visual representation of the hand coordinates: 
Now that you have the hand landmark coordinates, you can build a cursor to follow your index finger. To do that, you’ll need to get the index finger’s coordinates. You could use the array directly like this
And then you can get the coordinates like this:
I found cursor movement more pleasant to use with the middle part of the index finger rather than the tip because the middle is more steady. Now you’ll need to make a DOM element to use as a cursor. Here’s the markup:
And here are the styles:
A few notes about these styles:
Now that we’ve created a cursor element, we can move it by converting the hand coordinates into page coordinates and applying those page coordinates to the cursor element.
Note that we’re using the CSS Now that we have a working cursor, we’re ready to move on. Step 3: Detect GesturesThe next step in our journey is to detect gestures, specifically pinch gestures. First, what do we mean by a pinch? In this case, we’ll define a pinch as a gesture where the thumb and forefinger are close enough together. To designate a pinch in code, we can look at when the
It would be nice if that’s all we had to do, but alas, it’s never that simple. What happens when your fingers are on the edge of a pinch position? If we’re not careful, the answer is chaos. With slight finger movements as well as fluctuations in coordinate detection, our program can rapidly alternate between pinched and not pinched states. If you’re trying to use a pinch gesture to “pick up” an item on the screen, you can imagine how chaotic it would be for the item to rapidly alternate between being picked up and dropped. In order to prevent our pinch gestures from causing chaos, we’ll need to introduce a slight delay before registering a change from a pinched state to an unpinched state or vice versa. This technique is called a
The trick is that the delay must be long enough to be reliable but short enough to feel quick. We’ll get to the debounce code soon, but first, we need to prepare by tracking the state of our gestures:
Next, we’ll prepare some custom events to make it convenient to respond to gestures:
Now we can write a function to update the pinched state:
Here’s what
We can run
Now that we can reliably detect a pinch state change, we can use our custom events to define whatever behavior we want when a pinch is started, moved, or stopped. Here’s an example:
Now that we’ve covered how to respond to movements and gestures, we have everything we need to build an application that can be controlled with hand motions. Here are some examples: See the Pen [Beam Sword – Fun with motion controls! [forked]](https://ift.tt/yhBSMeT) by Yaphi. See the Pen [Magic Quill – Air writing with motion controls [forked]](https://ift.tt/rGueJNR) by Yaphi. I’ve also put together some other motion control demos, including movable playing cards and an apartment floor plan with movable images of the furniture, and I’m sure you can think of other ways to experiment with this technology. ConclusionIf you’ve made it this far, you’ve seen how to implement motion controls with a browser and a webcam. You’ve read camera data using browser APIs, you’ve gotten hand coordinates via machine learning, and you’ve detected hand motions with JavaScript. With these ingredients, you can create all sorts of motion-controlled applications. What use cases will you come up with? Let me know in the comments! (yk, il) via Pixel Lyft https://ift.tt/c8HhISn
0 Comments
We’ve spent the last two articles in this three-part series playing with gradients to make really neat image decorations using nothing but the We can do more with it, though, and that’s what I want to experiment with in this article.
Let’s start with our first example — an overlay that disappears on hover with a cool animation: We could accomplish this by adding an extra element over the image, but that’s what we’re challenging ourselves not to do in this series. Instead, we can reach for the CSS
The trick is to create an  The rest is what happens on Instead of using half the image size in this one, I am using a very big  You may face issues using We can take things even further! For example, instead of simply clipping the extra Cool right? The Oh, you want hearts instead? We can certainly do that! Imagine all the possible combinations we can create. All we have to do is to draw a shape with a CSS mask and/or And, yes, we can definitely animate this as well. Let’s not forget that I know, the animation is a bit glitchy. This is more of a demo to illustrate the idea rather than the “final product†to be used in a production site. We’d wanna optimize things for a more natural transition. Here is a demo that uses Did you know that the Combine all the things!Now that we have learned many tricks using gradients, masks, clipping, and outline, it’s time for the grand finale. Let’s cap off this series by combine all that we have learned the past few weeks to showcase not only the techniques, but demonstrate just how flexible and modular these approaches are. If you were seeing these demos for the first time, you might assume that there’s a bunch of extra divs wrappers and pseudo-elements being used to pull them off. But everything is happening directly on the Wrapping upWell, geez, thanks for hanging out with me in this three-part series the past few weeks. We explored a slew of different techniques that turn simple images into something eye-catching and interactive. Will you use everything we covered? Certainly not! But my hope is that this has been a good exercise for you to dig into advanced uses of CSS features, like gradients, And we did everything with just one via Pixel Lyft https://ift.tt/1zI3buY How to Improve the Checkout Performance of your Shipping App Shopify App Development (2022)10/27/2022 Checkout performance is a major factor in helping merchants get more sales, which is why we strive to ensure that shipping rates at checkout load at the optimal speed and without perceptible delay. If you build shipping apps, that also means that your app needs to be just as fast. To help app developers create optimal checkout experiences and return shipping options fast (< 500ms) and reliably, we have consolidated a list of six best practices to improve the checkout performance of your shipping app. Build apps for Shopify merchantsWhether you want to build apps for the Shopify App Store, offer custom app development services, or are looking for ways to grow your user base, the Shopify Partner Program will set you up for success. Join for free and access educational resources, developer preview environments, and recurring revenue share opportunities. 1. Store carrier retail rates internallyMany shipping apps function as aggregators for multiple shipping carriers in order to offer merchants rate-shopping functionalities. To avoid poor responsiveness of your shipping app, this dependency on carriers’ backed performance should be reduced when possible. We recommend storing carrier retail rates internally to avoid any external call. 2. Cache carrier ratesFor carrier rates that are highly dynamic or merchant-specific, there may be an opportunity to build a caching layer. While not every call to a given carrier will result in the same response, there will likely be a pattern for which rates are identical. Based on this, you can define a cache key. At Shopify, we built a self-healing caching system to significantly reduce the number of external calls and our dependence on shipping carriers’ backend systems. We recommend following these steps:
In action, these steps look like the following: Input Output
3. Parallelize calls to external systemsIf calls to external systems such as carriers cannot be avoided through local storage of public retail rates or caching, you can reduce the response time of your shipping app by calling carriers in parallel. Parallelization in combination with a timeout for slow carriers can be very effective in speeding up your response to Shopify while ensuring checkouts are not blocked as a subset of rates are returned. 4. Set timeouts for external systemsIf your shipping app fetches rates from multiple external systems and you are parallelizing these calls, your app’s response time to Shopify will be at least as long as the slowest response time. To avoid a timeout and a blocked checkout on Shopify’s side, we recommend setting an internal timeout that cancels your request to the external system if it fails to respond. Following this approach, you’ll be able to return to Shopify a subset of rates and unblock checkout. 5. Optimize the hosting of your serviceThe response time of your shipping app matters due to the impact it has on customers’ experience at checkout and, therefore, on merchants’ success. A share of the response time can be attributed to the latency between your app server and Shopify servers, which is particularly large when both are located on different continents. To understand the impact of server hosting on your response time, follow the below steps: 1. Create new file called 2. Use Example output: Find additional details in curl’s documentation. The impact of latency varies greatly between regions. Shopify servers are hosted on Google Cloud, for which different levels of latency by region apply as specified in the Google Cloud inter-region latency matrix. Recommended stepsIf your connection time is significantly higher than the Google Cloud inter-region latency, consider following the following actions:
6. Implement backup ratesTo mitigate the risk of blocked checkouts generally and in case of timeouts for external partners specifically, we recommend implementing a backup system for your shipping app (see Shopify backup rates). These rates should be stored in such a way that you can quickly fetch them when external partner requests fail to ensure a successful response to Shopify. Backup rates don’t need match rates fetched from external sources exactly, but should be sufficiently close to not significantly impact merchants’ profitability and conversion. By analyzing the response data your app is getting from external sources, you should be able to create such relevant rates for your merchants. Recommended steps
Find below an example of backup rates for domestic orders in Canada. Rates differ based on order weight only, but are independent of the specific origin or destination zip code. Dependency on multiple requests to ShopifyWe’re aware that in many cases applications may require information from Shopify that is not included in the Carrier Service API payload to calculate accurate shipping rates (such as customer or product tags). We would appreciate your feedback on what information is missing in the current payload that requires your app to make multiple calls to Shopify to calculate accurate shipping rates. You can provide your answer using this Google Form. By optimizing your shipping app for performance at checkout, you’re helping merchants boost conversion and make more sales—creating happier and more loyal users for you. via Pixel Lyft https://ift.tt/5s3cPx8 Would you like to send us some news?The Collective features the latest news and resources from the web design & web development community. via Pixel Lyft https://ift.tt/1hIbna8 The job title “web designer” keeps expanding. Depending on your role and how many people are on your team, the term “web designer” can mean a number of things, and the scope that it covers seems to keep growing with every year that passes. It can be beneficial for you to be familiar with multiple roles to help be the best, most functional, web designer you can be in 2023. Here’s everything you need to know. From having a grasp on your job description, to the visual elements of web design, to the functional elements of how a web project needs to work and perform. What Is a Web Designer’s Job?
The size of your website design and development team will greatly impact your “job” as a web designer. If you are on a larger team, your role may be more narrowly defined, but for designers on small teams or that work solo, you will find yourself doing all of these jobs in some capacity. Even if you aren’t necessarily doing some of these things, having a good understanding of them will make you a better designer. That makes these four things vital to know in 2023:
Then the job of a website designer breaks down into two more key functions:
Most people understand visuals as a key part of the design process, but the function is just as important. If something looks good but doesn’t work well, it will be inefficient and unusable. These two halves of design make a project whole. A Full Grasp of Visual Elements
Visual elements of web design cover a lot of things. When it all comes together, you have something that looks great and people want to engage with. But if even one of these things isn’t right, it can create a sense of unease with the design, even if you can’t quite put your finger on it. Here are all the visual elements a web designer needs to know: Copy and TypographyWords matter. How many times have you tried to finish a design without knowing the content? It’s a challenge. A designer needs to have a good feel for the copy and content – even if they write some of it themselves – so that they can match the words with the right typography for a tone that’s visually and contextually accurate. Using the right words with the right typography creates a context that facilitates comprehension and readability. Color TheoryMost website design projects come with a brand guide and basic rules for color usage. A web designer has to translate that for the web and have a good enough grasp of color theory to work with those brand hues effectively and use tints and tones appropriately. In addition to using predefined colors, a designer has to also know when and where to stretch. Is an additional background color needed? What variation of a light or dark background color works with the rest of the palette? These are all color solutions that are part of the design process. Spatial RelationshipsThe overall layout and spacing are vital parts of the design process. For many web designers, this starts with a grid. What’s the framework for the layout? Then it is creating consistency between pages and layouts and styles so that as the user moves through the design, there’s never a question about the relationship. Every page of the design – even with different layouts – looks like part of the same project. Layout and spacing are key factors in making that work. Images and VideoPlacement, cropping, basic editing, and content context are all important elements of website storytelling. Images and video are often the delivery method. Not only should a web designer be able to use images and video, but some basic editing is also important. Images have to be cropped for size, scale, and speed. Videos might require looping or compression to play well. The ability to hop into native software and make image or video edits is a valuable skill and will keep your project running smoothly. (Just think of all the time lost if you have to stop and wait for someone else to edit your photos or compress video files.) Illustration and IconographyWhen and how to use illustrations and icons is probably more important than actually knowing how to create them for a web designer. While both skills are important, the latter ensures that the design isn’t merely decorated and that illustrations and icons have a place. Use both of these design elements to bring extra focus or context to the overall design. Texture and DepthA web designer should be able to use all of the elements above to create texture and depth to ensure that the overall design does not fall flat. By working with layers, the design will come together in a way that ensures that has visual depth and variability. AccessibilityAccessibility is a big deal in website design and getting more important all the time. It is the role of the web designer to create a visual theme that can be understood by all and help ensure that all of the elements needed for accessibility are present. While there are add-on tools to facilitate accessibility, the best baseline is in the design itself. Thinking about text sizes, spacing, contrast, and screen readability should be part of the design process. A Clear Understanding of Function
In addition to aesthetics, website design is about function. No matter how good a site looks, if it does not work well, users won’t interact with it. This includes everything from navigation to speed to browser compatibility. Here are the functional elements a web designer needs to know: Navigation and StructureA good website has a series of repeating patterns and elements that are used interchangeably to create the overall design. This structure, or architecture, ensures that users know what to do on each page and that everything feels familiar. That’s why we design common elements such as main navigation or footers that are static from page to page. That sense of familiarity ensures usability and reinforces the idea to the user that they are not lost. User Interactions and ExpectationsUsers like interactive elements and things to do on websites. They’ve come to expect it for the most part. As a designer, it is important to incorporate standard user patterns and interactions so that people know what to do on a website. That’s why we use common icons – hamburgers to open menus or triangles to play a video – because users don’t have to think about what to do. Buttons need to do what they should do, links need to work, videos need to play, and so on. Every element in the design has to have a purpose in the overall structure and do something to contribute to the design. Speed and PerformanceThis one is a no-brainer, but takes good design practices on your part to happen – the website design needs to be fast. You only have a few fractions of a second for someone to make a choice about the site and whether they will stick with it or leave. Speed is a key factor in that decision-making process. Use Google’s PageSpeed Insights to see how your designs rank and what you can do to make them zippier. Device and Browser CompatibilityA design should look just as good on a desktop as on a phone and in Safari as in Chrome. There are a lot of devices and browsers to think about but compatibility is important. You can make some informed decisions using analytics to determine the basics of how your website is viewed most often, but devices and browsers change all the time and it is important that the design work for every person who accesses the site on whatever device they have in front of them. ConclusionThe job and role of a website designer seem to be growing all the time. You almost need to be a jack of all trades when it comes to website design, which includes everything from design to user experience to helping developers with functionality. The more fluent you are in all of these skills, the easier it will be to communicate your vision to the rest of the team working on projects. Good collaboration and teamwork can also result in more successful projects, so make a point to keep your skills fresh to keep projects moving forward. via Pixel Lyft https://ift.tt/y0TqwDL Think of a blog you liked recently. It was probably written by a thought leader with expertise in their field. After reading the article, you likely left the website with valuable information and a favorable impression of whoever published it. Starting a blog is an excellent way for individuals, companies, and startups to build an online presence that showcases their ideas and expertise. If they offer any services, that expertise helps their brands grow. But what are they, and do you really need one? Here’s our beginner’s guide on how and why to start a blog. What’s a blog?A blog is a web page focusing on articles, announcements, news, or guides relevant to the blog’s target audience. They sometimes exist as a separate section on a brand’s website. Blogs are primarily text-based content, but often include relevant pictures, videos, or infographics. The articles typically range from 500–3,000 words. They’re primarily a tool creators use to establish an online footprint, reach new audiences, gain organic traffic from Google searches, and collaborate with affiliates. Why should you start a blog?A blog lets you share your thoughts, services, and products with the world. Let’s look at a few advantages a blog provides:
How to create a blogStarting a blog is easier than you think. Don’t fret if you aren’t tech-savvy — this guide is all you need to get started. Wondering how to make a blog for free? We’ll also share some resources and templates. Here are six steps to your first blog post: 1. Pick a nameThe first thing to do is choose a name for your blog. If it’s your own blog, make sure the name represents your personal brand and conveys your intent. It could be your own name, a brand name, your company name, or a catchy title. Ensure the name is evergreen, versatile, and recognizable. It should also align with the content. A corporate blog, for example, should represent the company but also the writers who contribute posts. 2. Define your blog’s theme and list out the topicsBefore you start writing, choose several topics of interest you feel you can write about regularly. The subject matter must relate to your theme, but you can start general and narrow the focus as the blog progresses. Trying to cover too many different subjects confuses readers, so keep to a series of similar, well-connected topics. Split the blog into subsections and organize the topics accordingly so when articles start to add up it remains simple to navigate. 3. Know your audienceGet a firm grasp of your target audience before you start writing. Ask yourself:
It’s important to segment your target audience based on factors like experience levels and goals. Offering advice to younger readers on how to use social media won’t be particularly enlightening if they already know how, but combining social media with marketing or business offers them extra value. Creating subcategories for your target audiences lets you deliver content that meets a specific need. If you’re targeting graphic designers, for instance, you could generate separate content for beginner, intermediate, and advanced levels. It also helps to look at the competition. Research blogs within your niche or industry to gain insights on how to grow. The idea isn’t to copy these sites, but to understand what specific target audiences value in a high-quality blog. 4. Set up a domain and choose a platformYou’ll need to set up your own domain and select a domain name for your website. Once you’ve done that, select a web hosting service to host your new domain. Then, choose a platform. This is where the magic happens. A visual web development platform like Webflow lets you build a fantastic website to showcase your content without any knowledge of code. We have a guide that explains our content management systems and how to set up a blog on Webflow in four steps. 5. Pick a design that represents youThe goal is to create a visual appearance for your blog that matches your niche and content. Executing this takes time and thoughtfulness, so don’t rush. For example, writing about different elements of coffee would be complemented well by shades of brown and other earthy tones. Whatever colors you choose, be sure to create a color palette so you can keep your color scheme consistent throughout your website. 6. Write your first articleOnce the site is built, it’s time to write the first blog post. This article shouldn’t be an introductory post on who you are and what your blog covers — that’s why you have an “About” page. Focus early content on less common topics to improve your blog’s search engine optimization (SEO) potential. While it’s tempting to go after popular search terms related to your work, outranking established blogs for high-volume search terms is difficult. Consider focusing your SEO strategy on lower search volume long-tail keywords (longer and more specific phrases that are searched less) so you can carve out a space in the results page. Check out our beginner’s guide to ranking on Google for more guidance. Can you make money blogging?Some individuals make a living off their blogs and are considered full-time, professional bloggers. But how do bloggers make money? As your blog grows, you’ll attract more readers, increase traffic, and improve search rankings. A blog with high traffic is eligible for advertising — a potential income stream, if the numbers are good enough. Let’s discuss how to make money with a blog.
Need inspiration for your blog?Check out some of the most popular blogs in your industry to understand what your target audience expects. Here are some of our favorites. Oddigy Studio Oddigy Studio’s blog offers vibrancy while maintaining a simple design. Clearly labeled thumbnails and sections make it easy for the reader to find their way. Each blog post is eye-catching with a large header, single-color background, and contrasting text. And after reading an article, you’ll find a CTA and a contact form, including Oddigy Studio’s social media links. IVIX IVIX provides in-depth research that enables tax officials to learn widespread tax noncompliance. The blog has a minimalist design with few colors — white, black, and soothing shades of blue. Notice how IVIX uses negative space to let the blog elements breathe. The blog is “Home to novel shadow economy insights” — a crisp and concise description. Each article is clearly marked by category, with easy-to-find navigation at the top and bottom of each page. AirTree Ventures AirTree is a venture capital firm that supports technology companies in Australia and New Zealand. Similar to IVIX, AirTree opts for a minimal blog layout, but more classic in style — black text on a white background with a simple image. The blog is split into three sections: Featured Articles, Investments, and Insights, accessible from the “Browse category” tab at the top of the page. There’s a simple “Subscribe” CTA in the top right-hand corner with a picture of an envelope to make navigation easier and add a nice aesthetic touch. Build your blog with WebflowStarting a blog feels like a big deal, but with the proper guidance and some dedication, it will greatly benefit you and your brand. If you don’t want to start from scratch, our website builder offers ready made templates and premium themes for every blog niche. via Pixel Lyft https://ift.tt/bGrFwIo A personalized experience is one of the most highly valued features of a modern website design. However, gathering the right consumer data is essential to provide customized services to website visitors. After all, you can only enhance consumer experience and provide a better service if you recognize customers to a degree. The problem is, sometimes, such personalization comes at the cost of your users’ privacy. There’s a way around this though. You can prioritize privacy UX, build trust, and still generate revenue. If done correctly, a user-focused approach can turn into conversions and make you a stronger player in your market. Let’s see some common pitfalls and opportunities that you can use for your business or personal website. Why Personalization Is Not for EveryoneSelected design patterns can overcomplicate specific processes, like cookie notifications, that pop up every time you visit a website. Internet users are widely concerned about handing over their personal data for privacy and security reasons. Consumers value their privacy greatly and expect online services to do the same, which is why they reject businesses that don’t seem to get this right. People use many external tools to protect their activities. For instance, a VPN for PC and other internet-connected devices is one of the ways users defend themselves. A Virtual Private Network encrypts traffic and hides IP addresses. This stops certain web entities from collecting certain information about users’ behaviors and locations. However, besides using external security and privacy tools, companies themselves need to build safer environments. With all that in mind, finding the perfect equilibrium between gathering as much information as possible and maintaining consumer trust and value is challenging but possible. Here’s more about how to do that by reinventing your design choices for privacy permission elements. Selected design patterns can overcomplicate specific processes, like cookie notifications, that pop up every time you visit a website. Usually, such pop-up messages follow “dark patterns“, meaning that certain design elements coerce users into agreeing with likely unfavorable terms. About Privacy PermissionsThe process of data gathering begins with the privacy permission element. Since most people agree to the default privacy permission settings in online services and apps, companies and organizations must carefully consider their design choices’ influence on privacy permissions. Namely, privacy permissions represent an outstanding opportunity for organizations to incorporate an innovative approach combining compliance, privacy, and web design. Not only will this allow organizations to unlock valuable data from their customers, but it will also help them design an empowering customer journey.
Blending Customer Experience and ComplianceMost organizations believe there are only two different ways to approach the privacy issue – from the perspective of customer experience and compliance. As a result, the fear of being non-compliant creates two main problems for companies.
However, blending customer experience and compliance is possible, which allows companies to get the best of both worlds. How to Reinvent Design Choices for Better PrivacyHere are a few clever ideas if you’re curious about how you can reinvent design choices for privacy permission elements. Innovation Is the KeyUsing default copies of privacy and permissions won’t lead to a valuable customer experience. For a customer, simplicity is always welcome, so try sticking to a friendlier tone instead of using corporate language. Just make sure to remember all vital information. Moreover, the well-known cookie pop-up is the reason behind “consent fatigue,” which can prevent customers from engaging in a meaningful way. By implementing simple UX features that make the overall experience more user-friendly, customers can easily control their preferences and manage different privacy features. For example, toggles and layering features work great at bringing all management and privacy features together in one setting. Take Google as an example of a simple way to change your cookie pop-up. Of course, it did so after receiving a fine, but it made some positive changes that you can also adapt. Essentially, the new cookie banner will have buttons in the same size and color. Furthermore, one button will allow you to reject all cookies without needing to customize your choices deeper.
Implement User Research and TestingFinding out how customers interact with and react to the permission experience is extremely valuable when reinventing design choices. Thanks to user research and testing, companies can collect enough data to create the best designs for privacy permission elements. First, questionnaires can be used for user research. Through research, companies find out what permissions customers prefer. Nevertheless, more than research is needed to create the best-performing solutions. That’s where user testing comes into play. What customers claim in questionnaires and what they do in real-life situations are often different, which explains the need for A/B testing. By combining user research and testing results, organizations can develop the best designs for privacy permission elements. Emphasize the Importance of PrivacyPrivacy is everyone’s business, so UX designers and compliance experts should do everything in their power to protect their website visitors’ privacy. Even though their primary job is to achieve regulatory compliance or increase customer sign-ups, there’s no need to rely on dark patterns. Instead, designers, business leaders, and privacy experts should focus on improving the customer experience. They can easily do that by advising customers to use contemporary solutions that optimize their privacy experience. Furthermore, not all consumer data privacy aspects are governed by technical frameworks or laws. Thus, foster responsible data use that would drive innovation forward. Ethical UX Approach Paired With ContentThe phrase “we value your privacy” is used by thousands of providers. So it’s up to you to break the cycle of repetitive patterns. Ideally, you want your design decisions to make sense to your users. However, it is easy to fall down the rabbit hole of well-known approaches. For instance, UX and web teams should work closely with talented content writers. Thus, once you come up with an interface structure that ticks all the boxes, content should follow respectfully. The phrase “we value your privacy” is used by thousands of providers. So it’s up to you to break the cycle of repetitive patterns. After all, if someone reads a statement repeatedly, it might start to mean nothing. Innovative ideas can also help you build your brand. For instance, even a cookie notification can stand out from the rest with its design and content. Thus, every addition to your website is an opportunity to nurture your brand image. The Bottom LineAs personalization becomes one of the top strategies for business success and customers grow aware of the numerous privacy issues, organizations must find innovative solutions to allow customers to choose how their data is used and still equip companies with the needed information. With the right design choices, domain owners can make the most out of their privacy permission elements and blend customer experience with compliance. From the design, UX, and web teams, users expect to receive the most efficient way to change their privacy settings. Thus, do not make it overly complicated just because it favors your corporate goals. Users should not have to go through multiple websites to find and disable certain overly intrusive features. via Pixel Lyft https://ift.tt/wv32oi4 If you enjoy experimenting with cool artistic Photoshop effects, you’ll want to download all of the art photo filters and effects on this list. As huge fans of Photoshop actions, we can’t get enough of collecting cool Photoshop actions. And we know you feel the same way too. That’s why we wanted to create yet another collection of Photoshop actions. In this collection, we focus on PS actions and filters that allow you to add artistic effects to your photos. There are many different styles of actions, overlays, and PSD templates for you to enjoy. Have a look. 2 Million+ Photoshop Actions, Add-Ons, and Design Resources With Unlimited DownloadsDownload thousands of stunning Photoshop actions and add-ons with an Envato Elements membership. It starts at $16 per month, and gives you unlimited access to a growing library of over 2,000,000 actions, presets, design templates, themes, photos, and more. 
If you’re looking for a simple and quick way to transform your photos into digital art, this Photoshop action will come in handy. It features an easy-to-use effect that works on Photoshop CS3 and higher. The action includes 10 color presets and organized layers for easily customizing the effect to your preference. 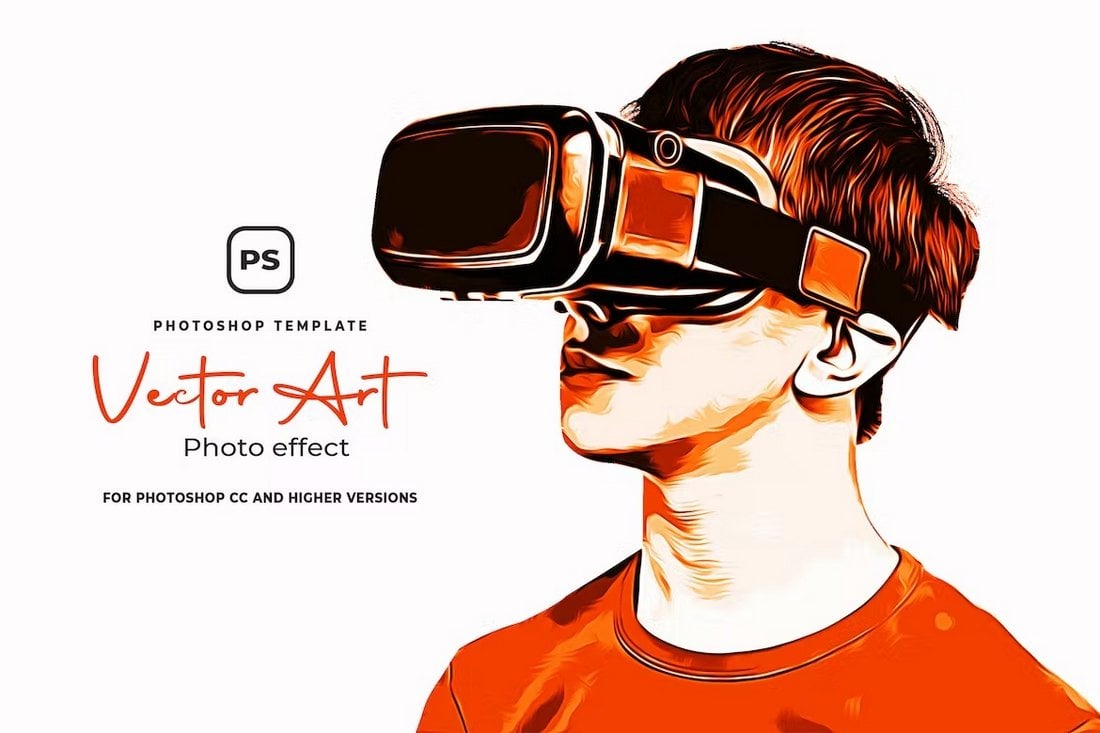
With this cool Photoshop action, you can create a vector art-style photo effect in just a few clicks. It comes as a PSD template so all you have to do is add your photo to the template and adjust the effect to match your photo. There’s a help file included to show you how it’s done. 
This Photoshop action has one of the best art effects we’ve seen. It allows you to easily turn your photos into illustrations or sketches. This action requires a little bit of extra work but it’s all explained in a video tutorial. The results you get from this PS action will be worth the effort. It works with Photoshop CS6 and higher. 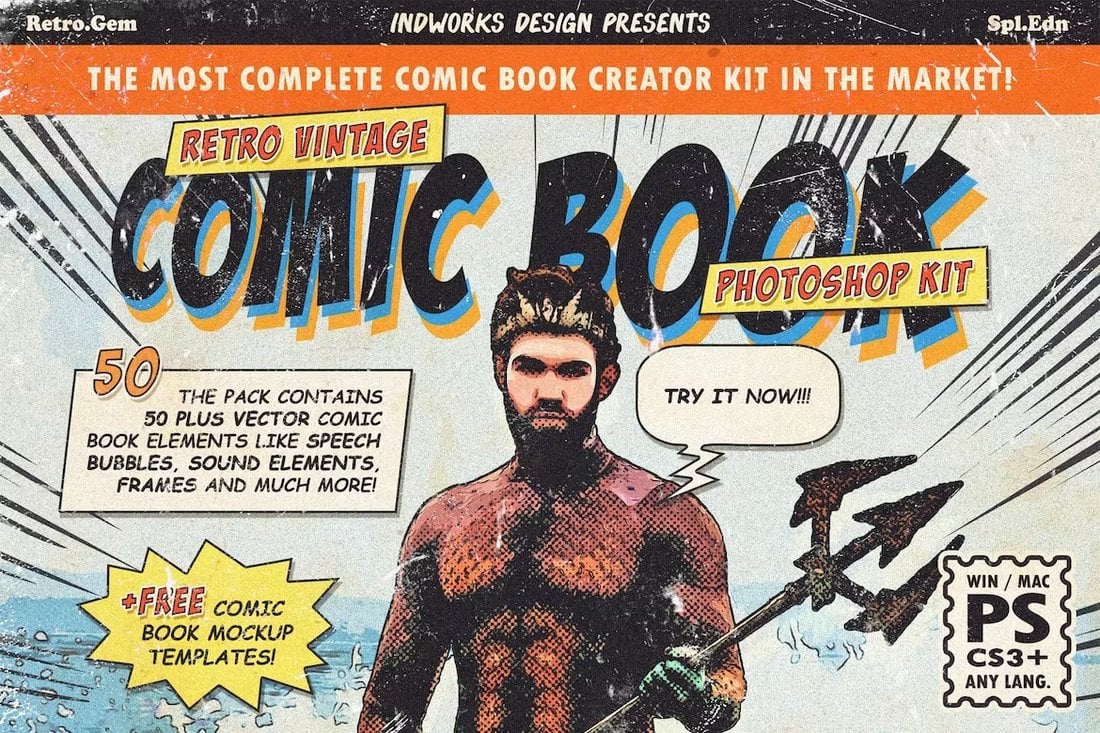
A big bundle of Photoshop actions, patterns, and PSD templates for creating realistic comic book effects. Along with the PS actions, this collection includes lots of comic elements, speech bubbles, comic book frames, and more. Basically, it has everything you need to create comic-style art and effects. 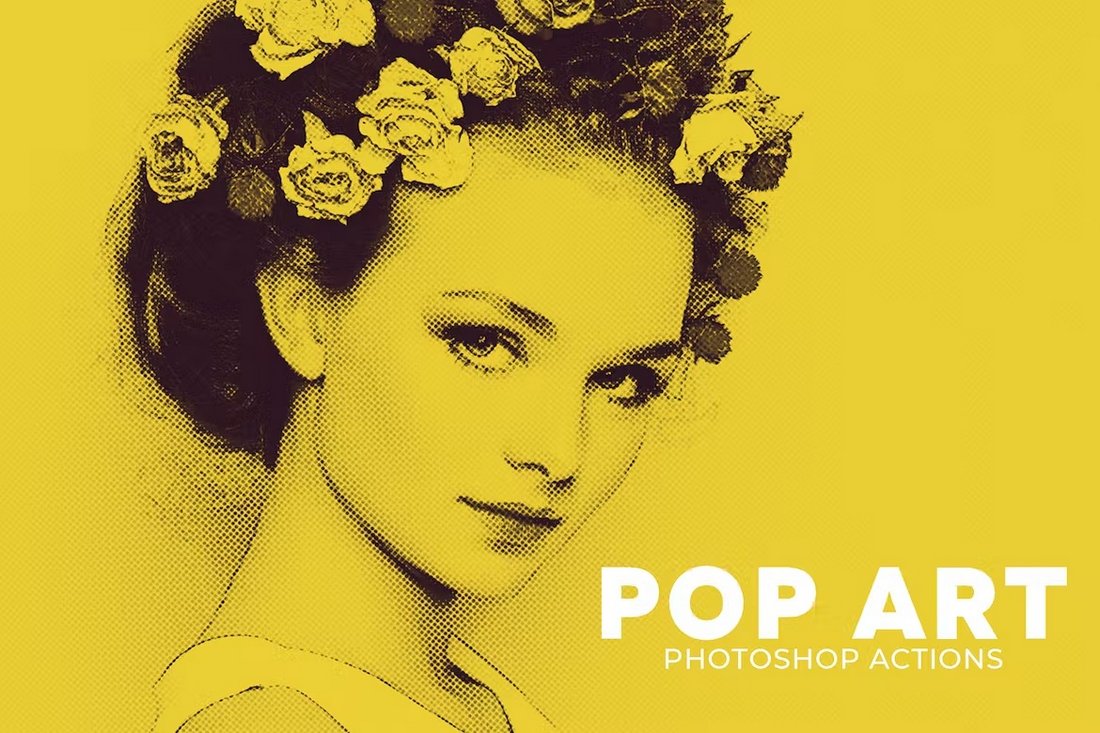
Easily create stylish pop art effects using this collection of Photoshop actions. This pack includes 20 different pop art effects you can use to instantly create an attractive pop art look for your photos. You can apply the effects with just one click and they are especially perfect for portrait photos. 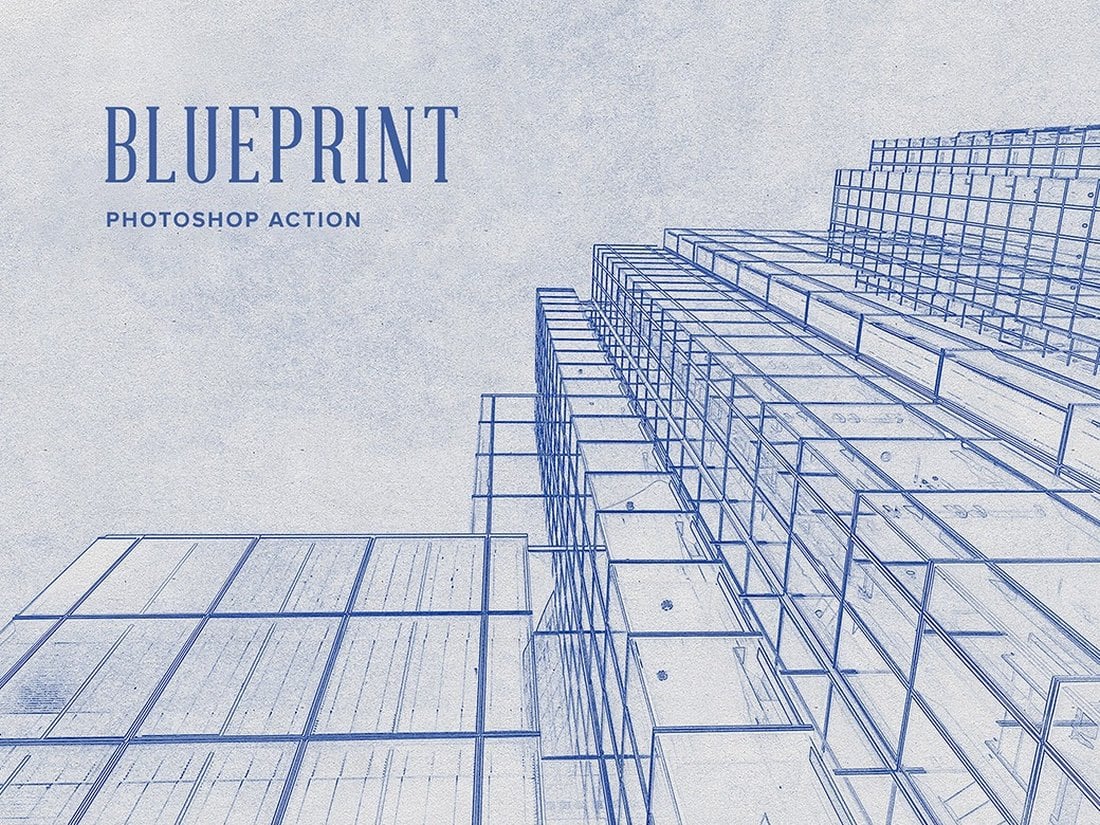
This is a free Photoshop action that allows you to generate blueprint-like art with your photos. It’s most suitable for structures and object-based photos, especially for buildings. 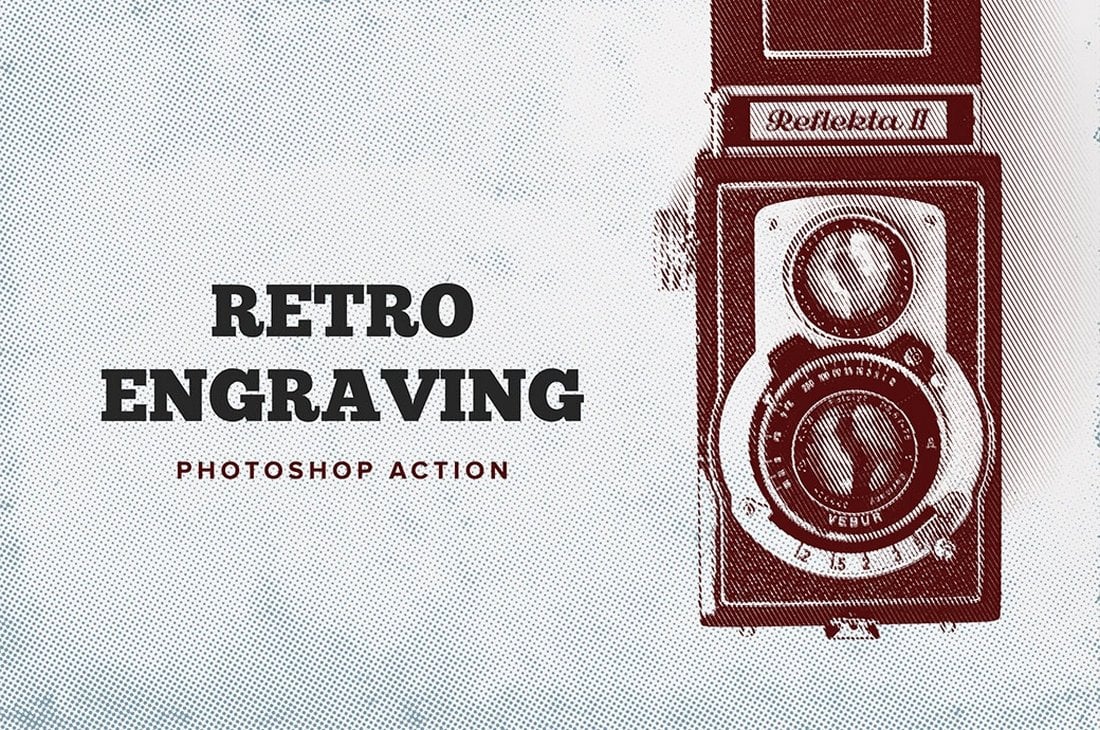
A unique Photoshop action that creates an engraved look for your photos. It features multiple styles of engraving patterns to choose from. And you can customize it to your preference. It’s free to download. 
Another modern and creative sketch art effect to use with your portrait photos. This Photoshop action comes with some additional resources such as brushes and patterns to help create more realistic-looking art effects. It includes a video tutorial to show you how to apply the effect as well. 
This is a simple Photoshop action for creating comic book-style effects for portraits. It’s perfect for graphic designers for creating cool effects to use in poster and flyer designs. As well as for experimenting with cool effects. This action works with Photoshop CC and higher. 
A very easy-to-use Photoshop template for turning photos into pop art. This template comes with organized layers and an easily editable layout. You can import your photo into the template to add the pop art effect without effort. Of course, you can customize the effect as well. 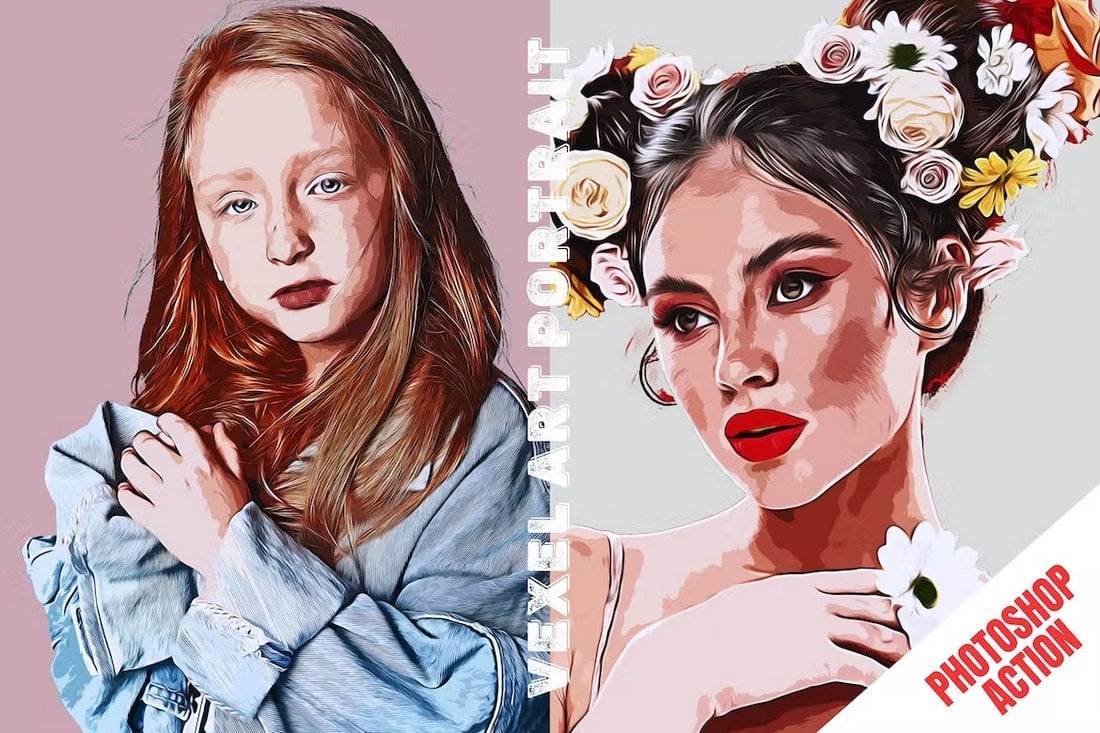
Be sure to download this Photoshop action if you want to create realistic vexel art-style effects with your photos. This action is compatible with Photoshop CC and you can use it with portrait photos to create beautiful effects and artistic illustrations. 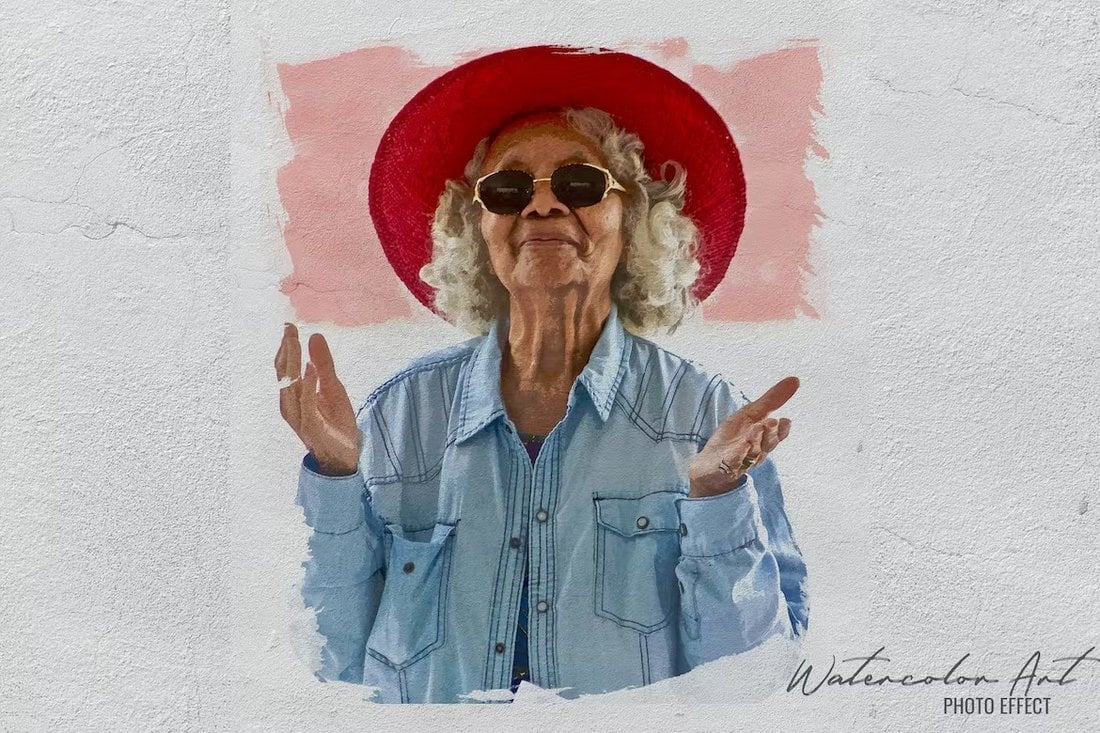
Want to turn your photos into watercolor paintings? Then give this Photoshop effect a try. It comes as an easily editable PSD template that you can customize to apply the effect to your own photos. All you have to do is edit the smart object layer and place your image. 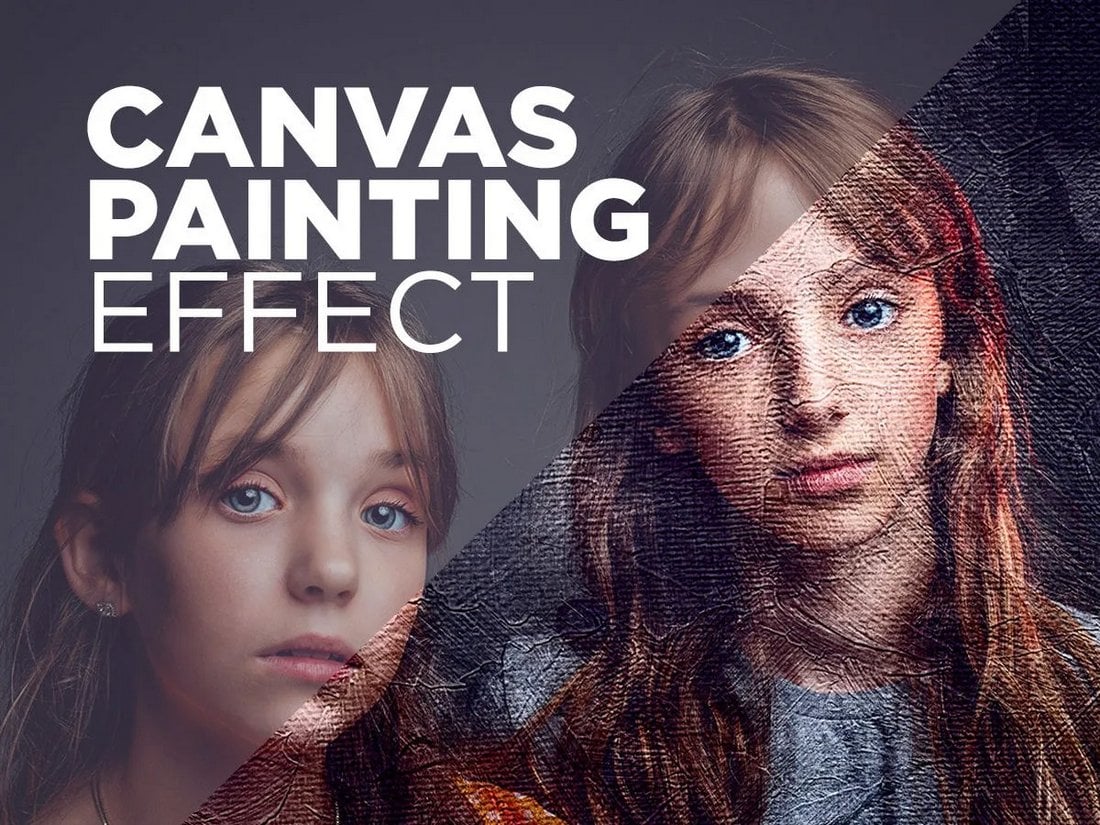
With this free Photoshop action, you can create a stylish painting effect to make your photos look like an expensive art canvas. The effect is customizable and comes with a help guide document. 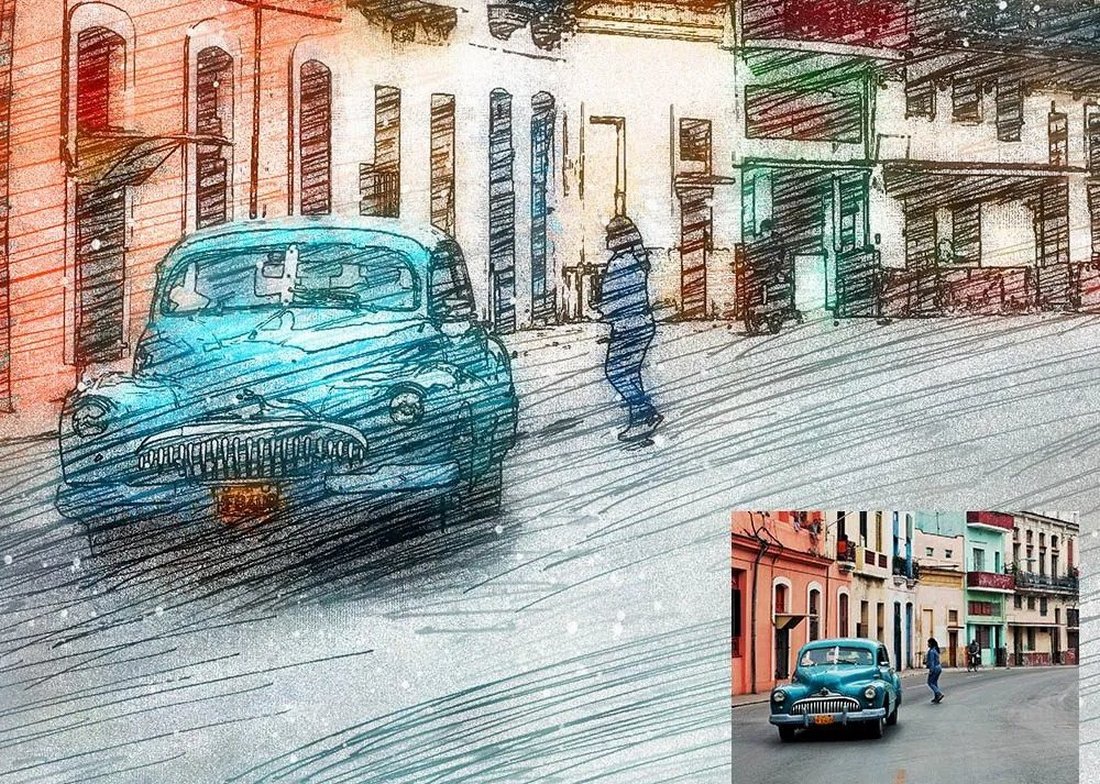
Even though this Photoshop action creates a simple pencil sketch effect, the colors allow it to turn your photos into beautiful drawings. The PS action is also free to download and use. 
This Photoshop action allows you to design colorful modern art with your photos. It features a unique effect that uses many different types of visual elements and over 40 color presets to create modern art-style designs. This action works with Photoshop CS3 and higher. When talking about art effects, we can’t forget about pixel art. It’s one of the most popular trends in retro art design. You can use this Photoshop action pack to create cool pixel art effects for your photos. It includes 21 different color tones and styles. They are compatible with Photoshop CC. 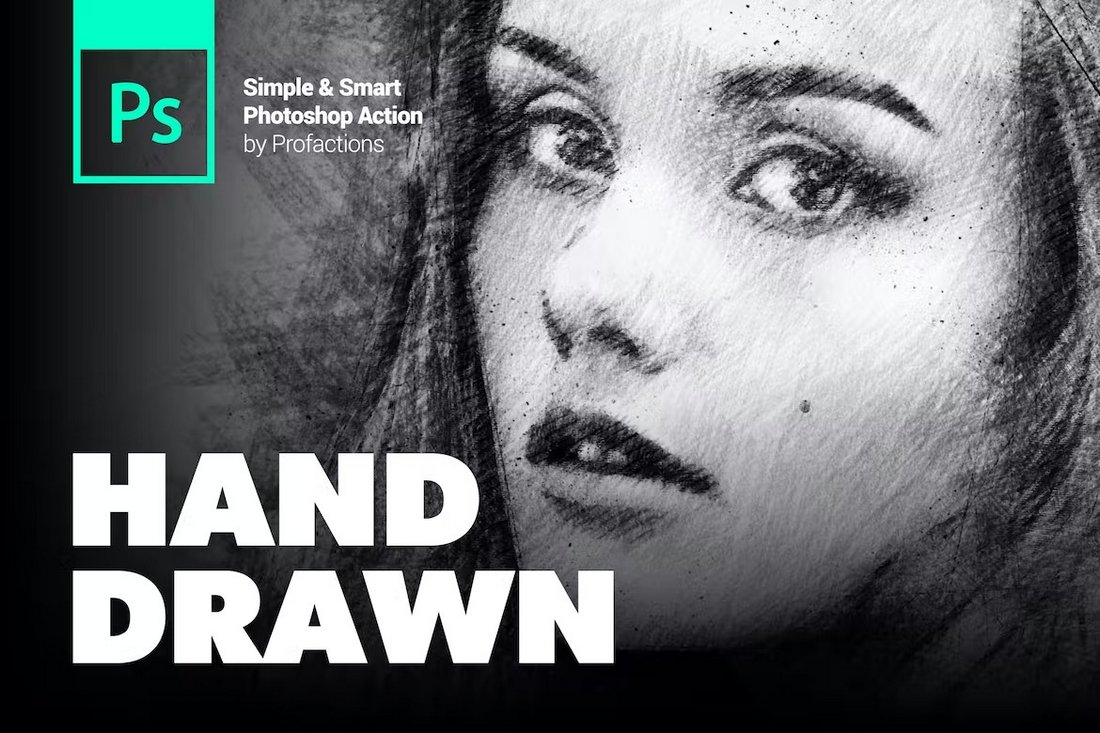
This Photoshop action features a cool effect that creates a hand-drawn sketch-style look for portrait photos. It also works great with photos of buildings and structures to create blueprint-like art effects. The action works with just one click. 
Another creative pop art Photoshop action that features a design inspired by the famous Barack Obama “hope” posters. This action creates a colorful pop art effect that works perfectly for portrait photos and graphic designs. It’s compatible with Photoshop CS6 and CC. 
You can create a pencil art-style effect for your photos using this Photoshop action. It features a sophisticated effect that uses custom textures, patterns, and brushes to generate realistic art designs. A video walkthrough is included to guide you through the process. 
This Photoshop template will allow you to create pop art effects in just a few clicks. It comes with organized layers and a colorful pop art effect. You can use the smart object layer to instantly apply the effect to your photos. It’s that simple. 
You can create bright and colorful modern art-style designs with this Photoshop action. It includes a cool paint splash effect with unique elements. This effect is great for graphic design as well. 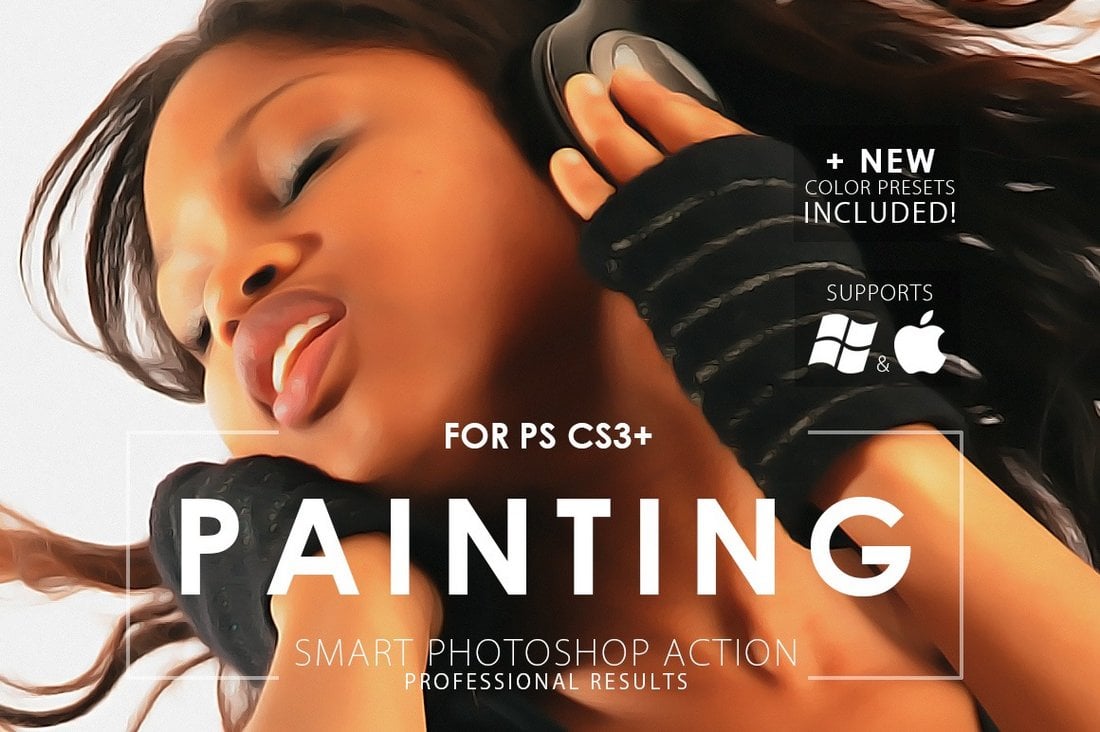
A free Photoshop action for creating smooth painting-like effects for photos. This effect works great for portrait photos. And it comes with several different color presets for you to choose from. How to Make Pop Art in Photoshop (Tutorials)If you want to make your own cool pop art effects in Photoshop, here are a few great free tutorials you can learn from. How to Create Pop Art Photo Effects With Photoshop Actions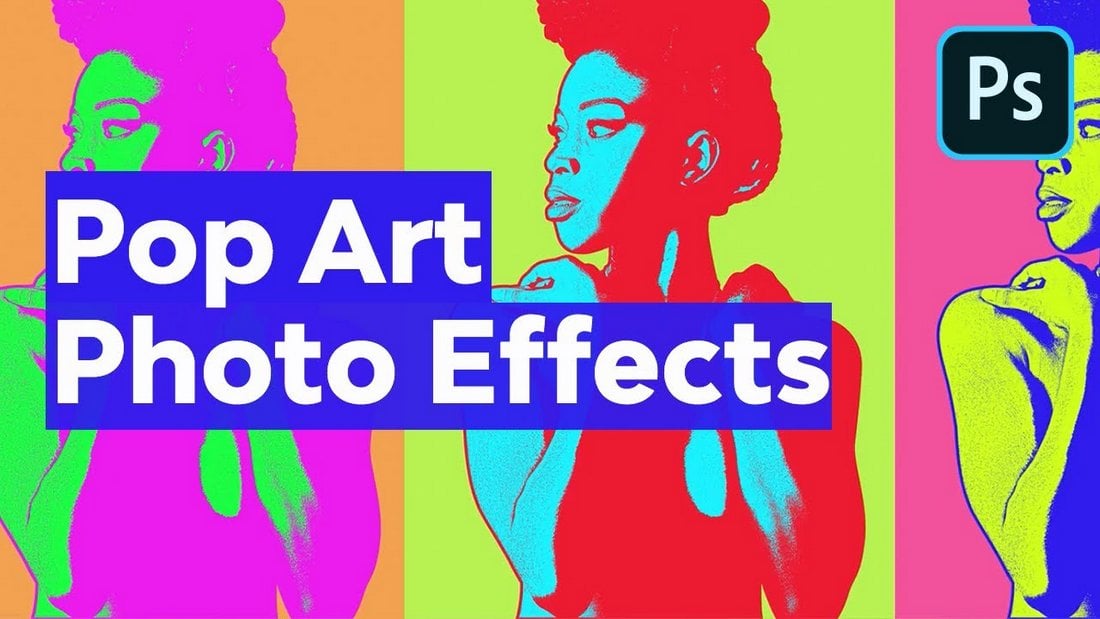
The easiest way to create pop art effects or any other type of effect in Photoshop is to use Photoshop actions. This simple tutorial video will show you how to use actions to create a high-quality pop art effect. How to make a Pop Art portrait from a Photo
This is a bit more advanced tutorial that will teach you how to create a more authentic pop art effect for a portrait photo. It goes through the process with easy-to-understand step-by-step instructions. How to create a textured Pop Art Photo Effect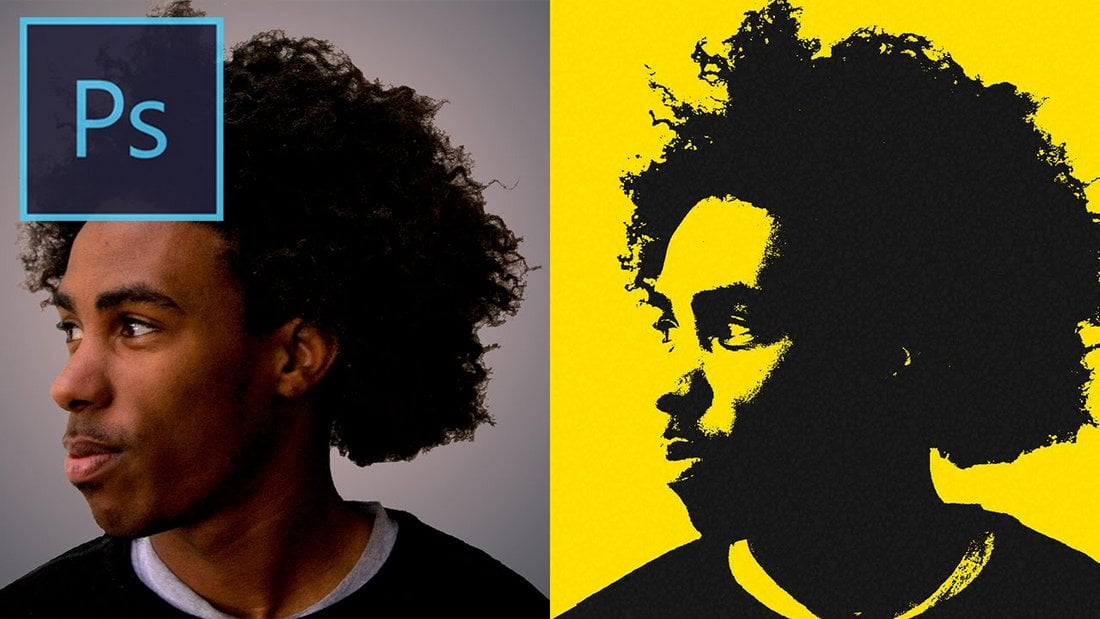
If you want to create a basic pop art effect more quickly, this tutorial is perfect for you. It will show you how to create a basic pop art effect in just a few simple steps. Pop Art Photoshop Tutorial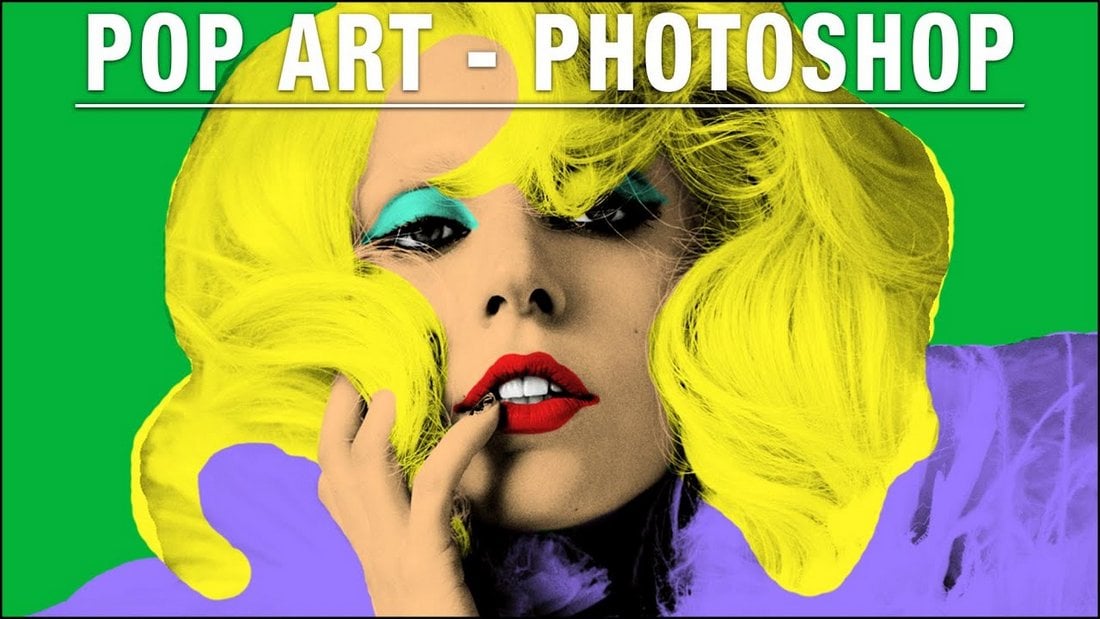
This tutorial shows you how to create a different style of pop art effect. It’s ideal for designers looking to experiment with cool new effects in posters and flyers. You can find more amazing effects in our comic book Photoshop actions and best Photoshop actions collections. via Pixel Lyft https://ift.tt/pRJo9nI Everyone needs high-quality stock images; they’re essential for breaking up text-heavy websites, creating an emotional connection with your users, and for reinforcing your brand. They say images are worth 1,000 words, but with the way users tend to scan and read online, it’s more like 10,000. So the next time you’re looking for high-quality stock images, check out Photostockeditor.com. Its images are all free to download, and it has just introduced AI-generated photos to increase your options further. Download Free Stock ImagesOne of the best things about Photostockeditor is that you can download images without registering. That means you don’t have to waste time creating an account to download a few photos! Photostockeditor has a robust search algorithm, which means if you’ve found an almost-right image, the search algorithm will help you find the all-the-way-right image by suggesting similar photos — it’s spookily accurate. 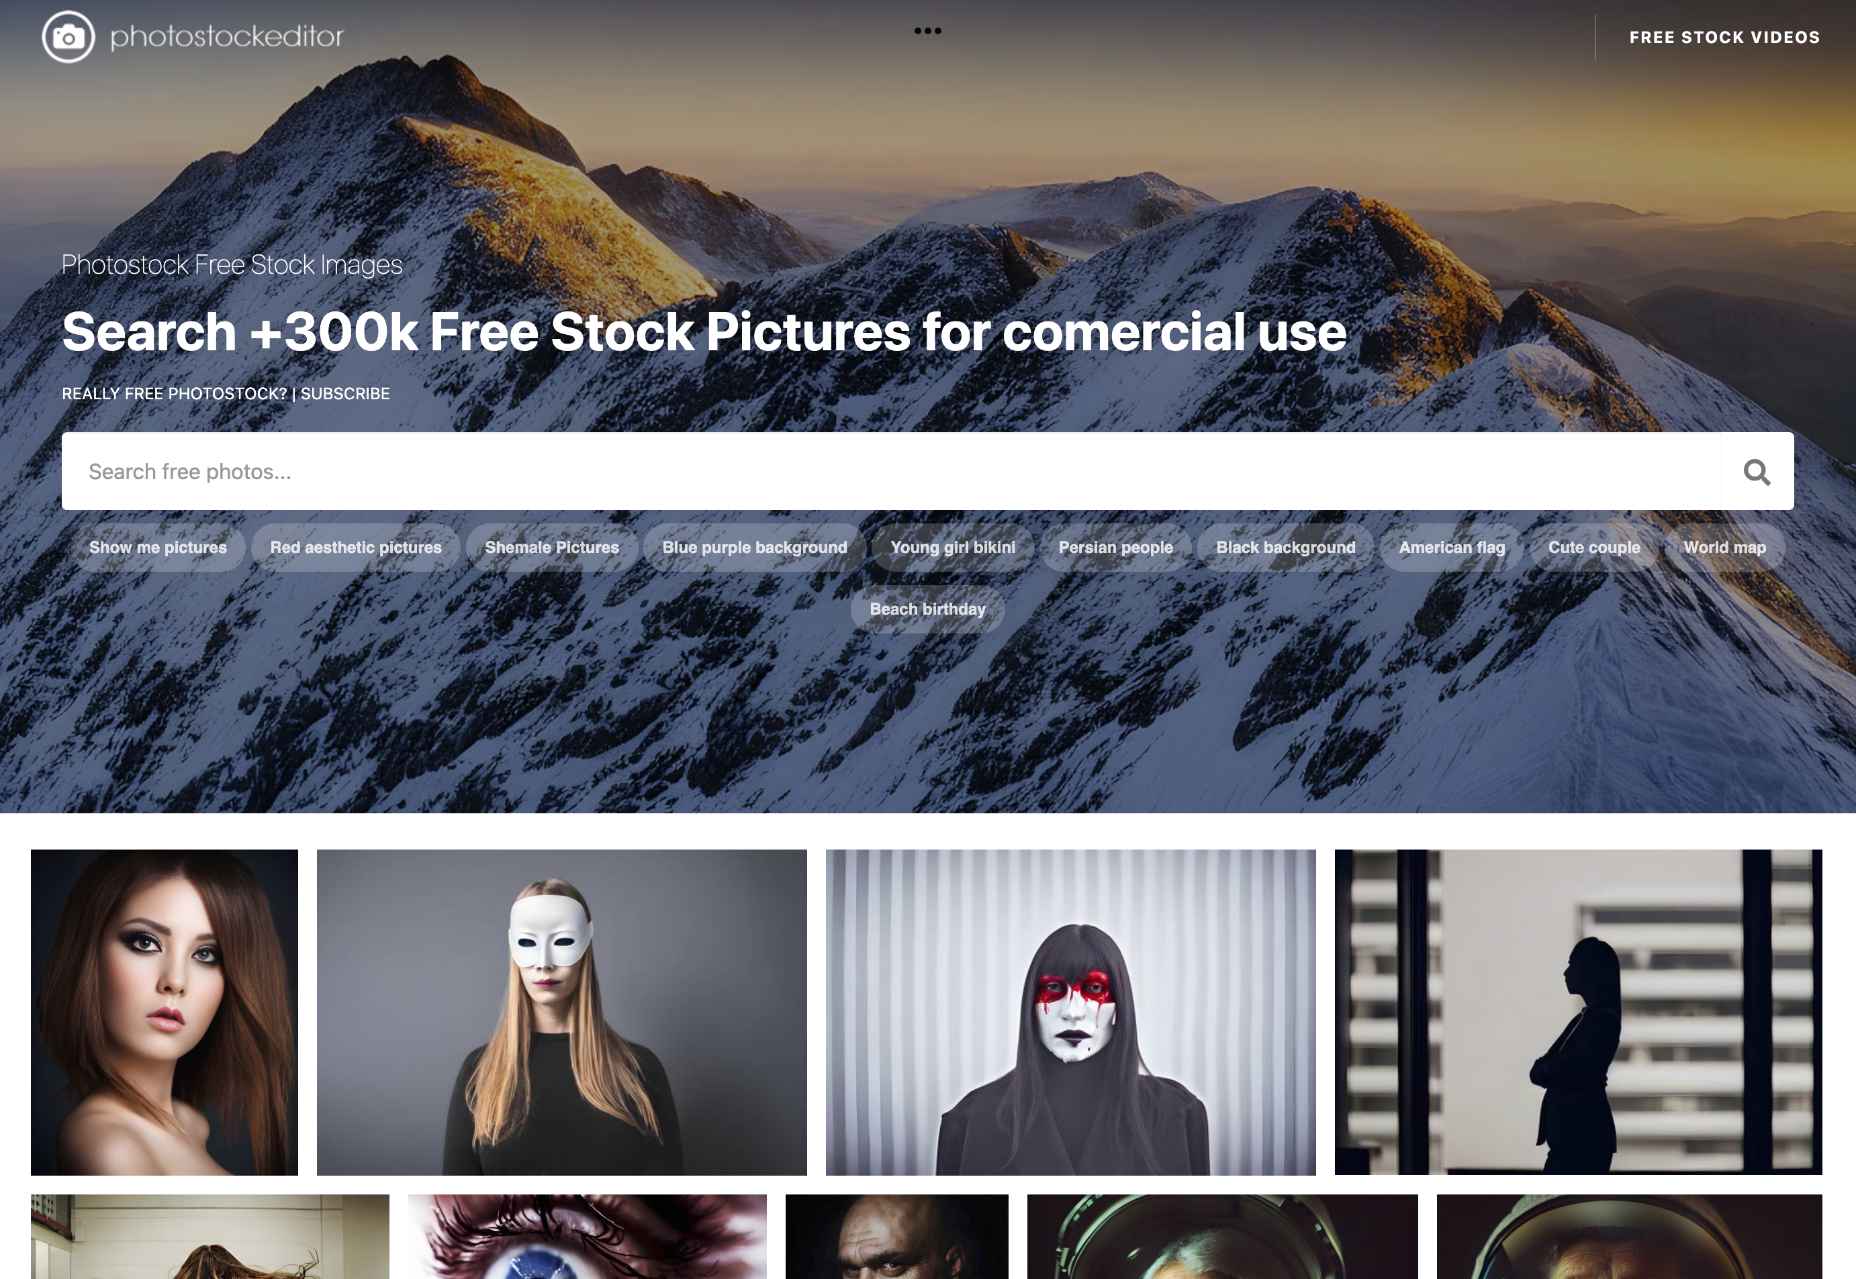
Free AI-Generated ImagesPhotostockeditor.com already has over 350,000 photos that you can download for free. That’s an incredible resource by any standard. But now, it has introduced AI-generated images to give you even more options. We all know that AI images will be incredible…one day. These days, AI-created images are a little hit-and-miss. For every masterpiece, you get a few dozen duds that really aren’t of any use. Photostockeditor.com combats this problem by using skilled photographers to curate all of the images produced by AI. Once selected for inclusion in the library, images are professionally retouched in Photoshop to ensure they meet Photostockeditor.com’s very exacting standards. No More Copyright IssuesWhen you’re browsing a stock site, you’ll often see different types of licenses. For example, some licenses let you use an image however you like, other licenses place modest restrictions on usage, and some will provide really controlling limits on you, like the number of visitors your website is permitted to have when using the image. Those kinds of licensing headaches mean finding a good image that is also commercially usable is incredibly frustrating. Photostockeditor.com provides one license: you can download and use all the images on the site for personal or commercial use entirely for free. What this means is that you can find the right image for your project, download it, and then forget about licensing; nobody’s going to come looking for a payout as they might with other stock images. You don’t even have to credit Photostockeditor.com as the source — although attributions are welcome. 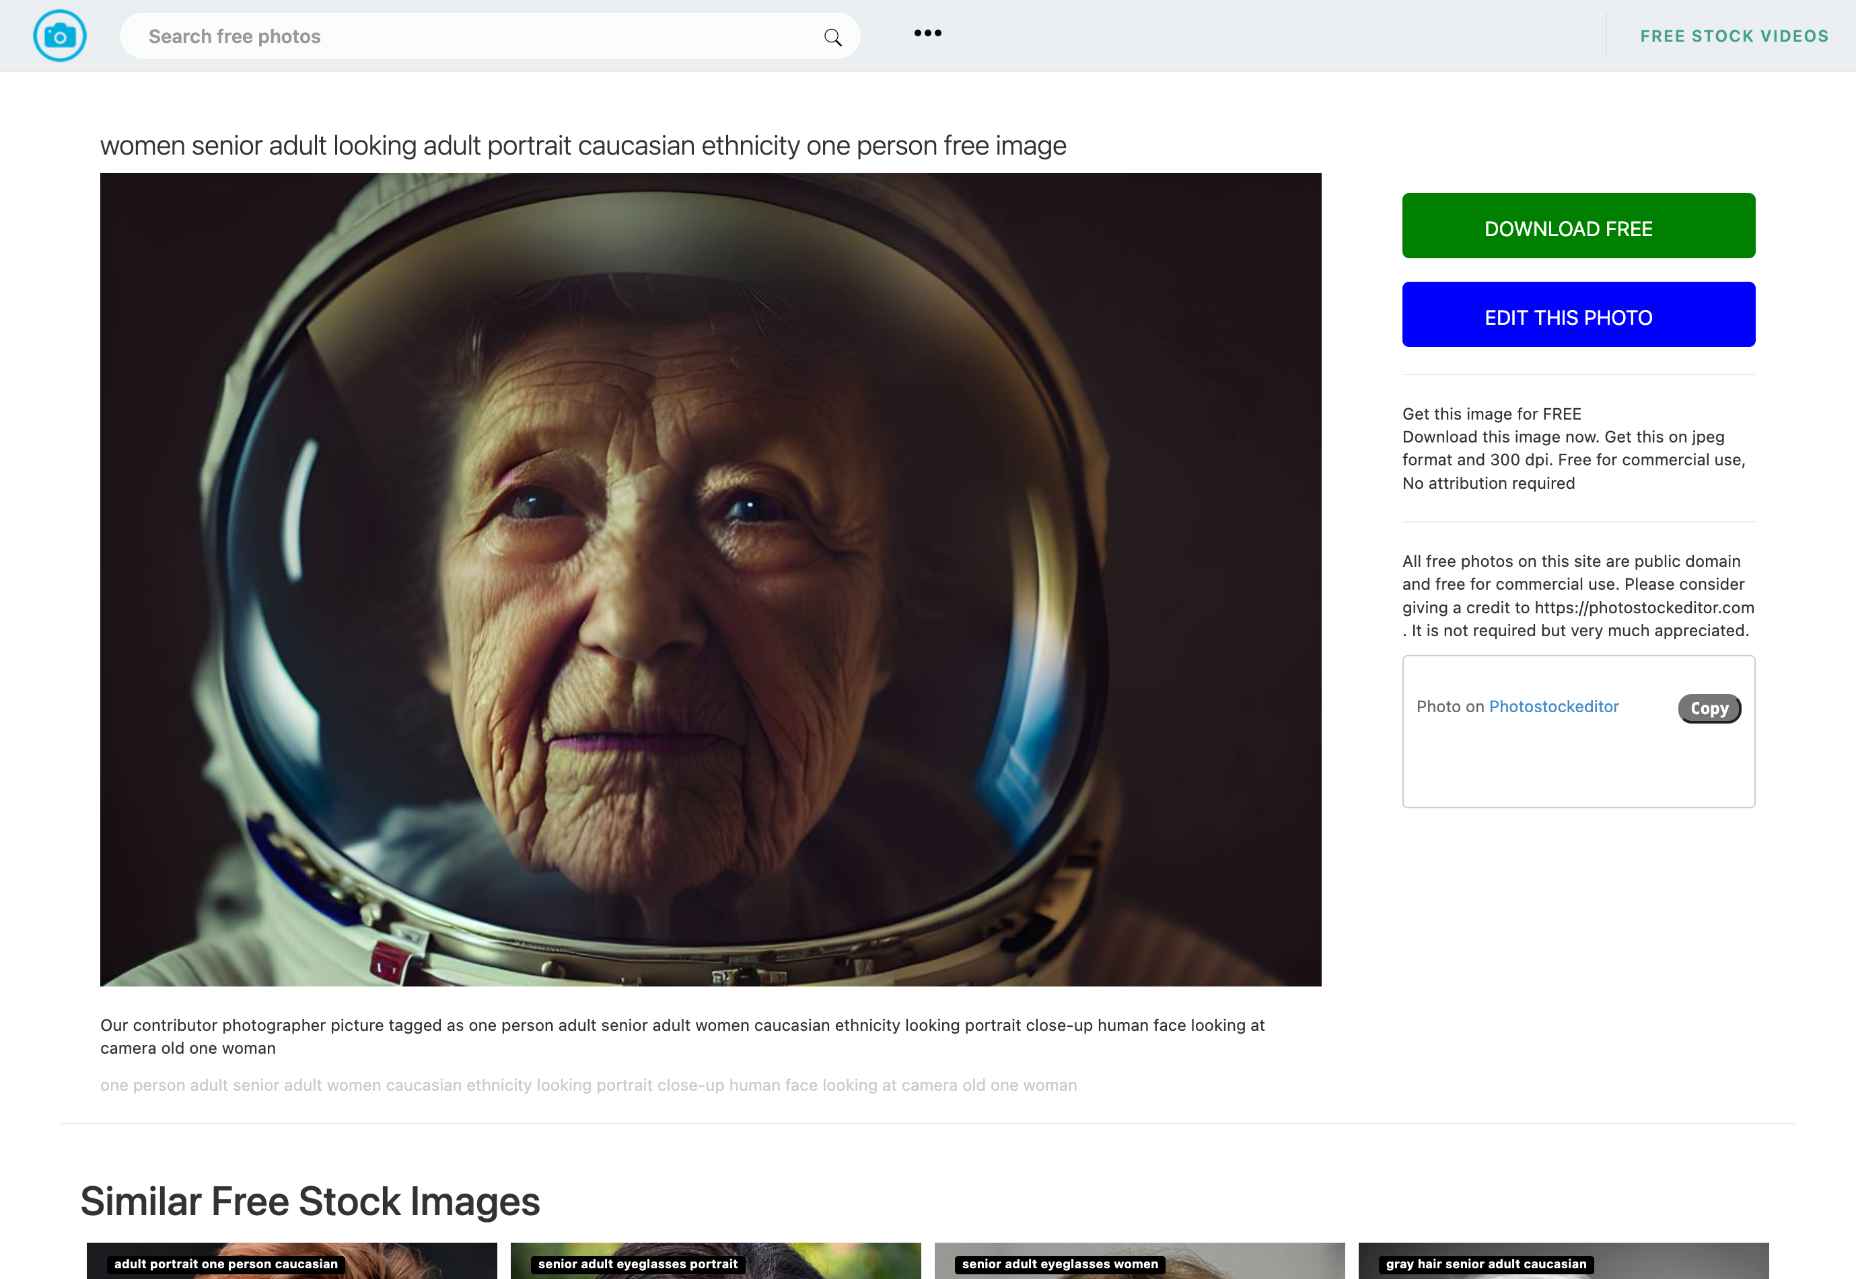
Edit Images OnlineFinding the right image on Photostockeditor.com is easy; you can search by keyword or browse by category. You can find pictures of people in any style, perfect for any project. Plus, all images on the site are in 4k resolution! Once you’ve found an image you want to use, you can customize it with Photostockeditor.com’s excellent online image editor. This handy tool can crop, resize, and edit your photos to perfection. The online photo editor also offers filters, effects, and more! You can even add text or watermarks to your photos. Plus, the online photo editor is also completely free to use! ConclusionWith more than 350,000 free-to-download images, Photostockeditor.com is the perfect solution for all your stock image needs. With new AI-generated images, high-quality photos, and free downloads, Photostockeditor.com has everything you’re looking for. So what are you waiting for? Browse Photostockeditor today!
[- This is a sponsored post on behalf of Photostockeditor.com -] via Pixel Lyft https://ift.tt/SJ9ydqV Simon Goellner (@simeydotme)’s collection of Holographic Trading Cards have captured our attention. Under the hood there is a suite of Josh Dance (@JoshDance) replied with a breakdown of the effects that lets you manually control the inputs. via Pixel Lyft https://ift.tt/A3PoMEh |
AuthorWrite something about yourself. No need to be fancy, just an overview. Archives
April 2023
Categories |


 RSS Feed
